- 8 minute read
- Business Management Tips
- Dashboard & FareHarbor
Beginner
Get a behind-the-scenes-look into FareHarbor's 2024 season

Hopefully you’re familiar with the Bookings section of your Dashboard and the various view, filter, and display options. But did you know you can also save your favorite filters and display options as a custom calendar?
From views for specific guides or employees to filters for certain items or locations, custom calendars are the key to an efficient, organized Dashboard. Here are four ideas for creating a custom calendar that you and your team will love!
Instead of viewing every booking in one place, custom calendars arrange availabilities by different views, filters, and display options. One major perk of making custom calendars is that they reduce load time in your Dashboard.
See all the customization options here or take a look at this on-demand webinar for a more detailed overview.
 Custom Calendar for Reservationists
If you frequently take bookings over the phone or help customers find the earliest availabilities to meet their group size and schedule needs, a custom calendar is the best way to quickly see open time slots.
Reservationists will also find custom calendars especially useful for walk-up customers and last-minute bookings.
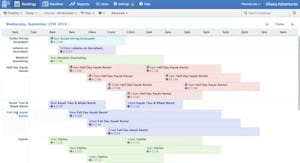
We recommend starting your reservationist custom calendar on the agenda or timeline view, which shows you a great overview of all the bookings and openings on a single-day or hourly basis.
The grid view also gives a nice overview of bookings on a larger scale if you’re helping a customer find a tour date that works for them.
 Custom Calendar for Multi-Location Businesses
Do you operate a business with several locations? Instead of sifting through every item and availability across locations, you can create a custom calendar that only displays bookings for a given location.
This feature offers quick information at a glance, allowing you to view open availabilities or compare bookings between the different spots. And if your team gets a phone call or inquiry about availability, you can quickly ask the customer which location they’re interested in and go to your saved custom calendar to best assist them.
A custom calendar based on location can also be helpful if your business shares equipment or resources between storefronts. You can get an idea of the schedule at each location and ensure you have enough equipment and guides scheduled to cover the bookings.
 Custom Calendar for Individual Guides & Employees
Do you have multiple tour guides or employees signing into your Dashboard to see their schedule for the day? Give them each a custom calendar so they only see the tours and activities assigned to them (learn how to assign crew members here).
 Pro tip: Make things even easier for tour guides and employees by saving the custom calendar as their default calendar! This way, they see that calendar every time they log in without having to navigate to it. Every user can save their own default calendar for ease of use. See instructions here.
Not only will this offer a more streamlined experience, but it also allows your tour guides to stay organized and save time since they’re able to view everything they need to know about their daily schedule at a glance.
 Custom Calendar for Equipment Rentals & Inventory
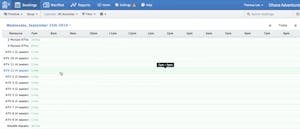
Need to get a quick visual on your available resources? Use the timeline view to create a custom calendar that gives you a snapshot of what equipment is booked and on hand throughout the day. This calendar is great for businesses that get frequent walk-up customers and last-minute bookings.
You can also group resources being used in the same timeframe by item or availability, for instance. And if you have resources that weren’t booked, you can hide them altogether for a more streamlined view of the day.
Make your resource timeline by following these instructions.
 Custom Calendar for Gift Cards
Create a calendar with only gift cards to track how many have been sold or redeemed. Filter by item and select your gift cards for a simplified calendar that tracks a flat number of bookings.

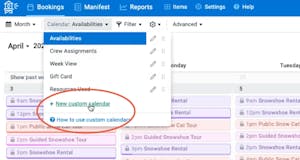
Before you head to your Dashboard to create a new calendar, keep a few things in mind. Remember, every time you update a calendar by changing the view and filters, you must save it as a new custom calendar or it will not save your selections for the next time you log in.
Give your custom calendar a specific name that pertains to the goal of that calendar. For example, if you create a calendar for each tour guide, make sure to include their name in the title so everyone viewing your Dashboard knows exactly which calendar is for which guide.
Finally, don’t be afraid to dive in and play around with your calendar! If you don’t like the changes you made, it’s easy to start over and just avoid saving the custom calendar until you find what works for you.
This functionality is all about creating a custom calendar that works best for you and your business needs.
Are you more of a visual learner? You can see custom calendars in action in this on-demand webinar.