- LIVE NOW
- Business Management Tips
- Industry Insights
Hiring Like A Boss with Byron and Zoe Kay of Kona Honu Divers
All Skill Levels
Get a behind-the-scenes-look into FareHarbor's 2024 season
Virtual tours are a fun and exciting way to engage with your audience when you’re unable to run your traditional, in-person tours. Tour and activity operators around the world have experimented with online cooking classes, wine tastings, and other virtual events as a way to entertain at-home viewers while generating interest in their brand. But for businesses that run sightseeing tours or other experiences of that nature, a simple video chat can’t quite capture the magic of the places you typically visit.
So we had one FareHarbor employee test drive a popular virtual tour software, Google Tour Creator, to help walk you through the process of bringing your tour to the small screen. Follow along as she creates a virtual food tour to several local restaurants and see for yourself how your experiences can come alive through vibrant photos, points of interest, and tour guide narration. This guide serves as a roadmap of Google Tour Creator and covers features, tips, and limitations to help you decide if GTC is right for you. Let’s get started!
Google Tour Creator is promoted as “an easy way to build immersive, 360° tours, right from your computer.” One of the most appealing aspects of Tour Creator is that you don’t need much to begin experimenting with it yourself. It’s free, online, and works with Chrome, Firefox, and Safari. It’s also compatible with Google Cardboard and Google Expeditions if you are additionally using those tools.
Having no prior experience with the product, I wanted to test it out myself. Right away, getting started was straightforward and intuitive. A simple Google search displayed Tour Creator as the top result and with a click, boom, I was in!
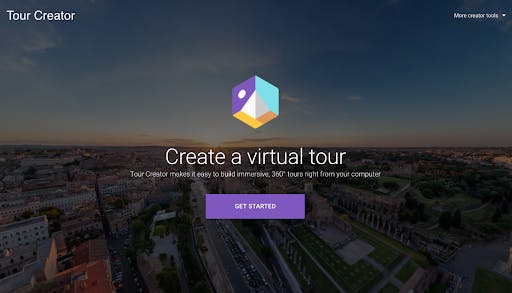
At first glance, the interface appeared modern, sleek, and inviting. Opposed to a landing page outlining product benefits and usage examples, I was met with only a clear button prompting me to go ahead and get started. Well okay then, let’s do this!
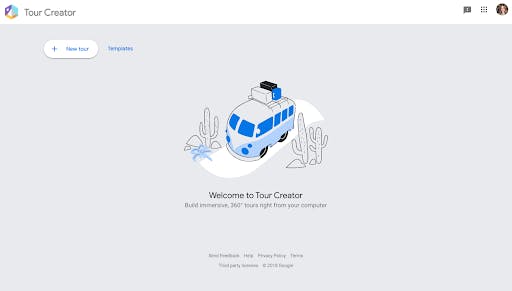
From there, a secondary welcome page, as minimal as the first, directed me to the “new tour” option in the top left corner.
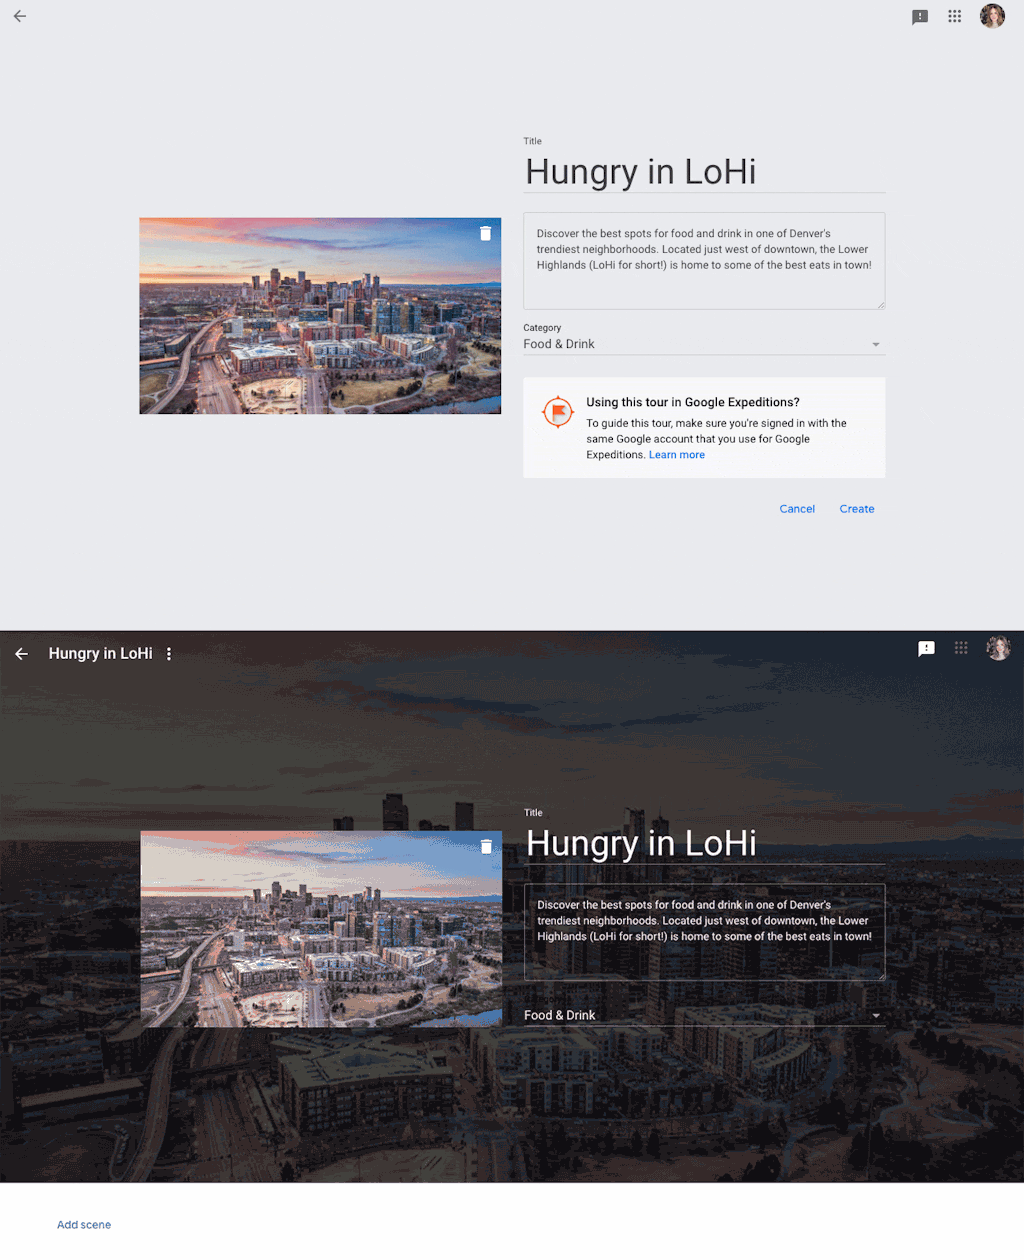
In full transparency, I don’t actually have a tour operation myself, so I decided to create a fictional food tour featuring a couple of restaurants in my neighborhood for experimental purposes. With that concept in mind, I was able to easily populate the various input sections with a cover photo (.jpg or .png file types), the title of my tour, and a description. So far, so good! This page also allowed me to choose from a set of 18 categories to label my tour. The “Food & Drink” option felt pretty on the nose for my budding food tour, but “uncategorized” was also an option for any outliers.
I personally did not intend to use this tour in tandem with Google Expeditions, but for anyone who is, this step of the process included a callout to be sure to be signed in with the same Google account associated with your Google Expeditions account.
After filling out the form and hitting “create,” my information was translated into a simple, sleek landing page. Success! Now what?
The next step appeared to be to “add scene,” mostly because that was really the only choice of what to do next. This prompted two options: “street view” or “upload.” I decided to try one of each — life is short, you know!
Street view supplied a very familiar view of a Google Maps input field where I could type any location in the world — pretty cool! From there, it appeared to auto-populate the image field with whatever existing 180° or 360° photos Google found for that particular location. I played around with a few different locations to see what types of images were available, and some locations definitely had better imagery than others.
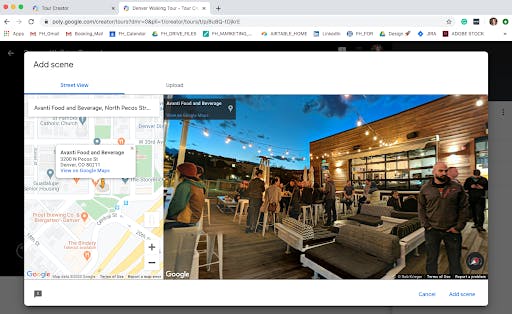
Pros? You can instantly add imagery of any location in the world without having to take a single image yourself — it really doesn’t get easier than that! With a little searching, I’m sure you could put together a beautiful array of sights and scenes with very minimal effort in terms of actual photo-taking.
Downside? This option is limited to what exists currently on Google, which could be limiting depending on what you are attempting to showcase. I personally also felt that this option was slightly inauthentic. By incorporating images that weren’t my own, it didn’t feel like I was presenting my own unique viewpoint to the world, and instead only repurposing someone else’s imagery.
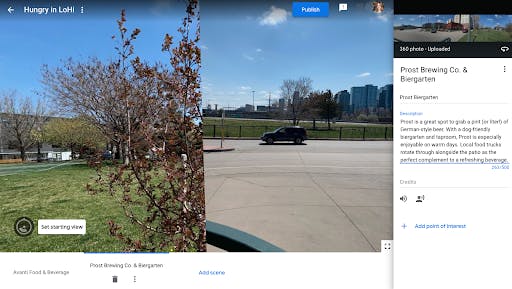
The Upload option, however, allowed me to upload any 180° or 360° image I had stored on my computer. I had a panoramic image I had taken on my iPhone, so I used that to test out this option. My image uploaded instantly but since it wasn’t a full 360° image, there was a harsh divide in the frame on the tail-end of the scene-scape. This may not bother some, but to me, it definitely took away from feeling like you were immersed in the scene once you ran into that portion of the frame.
Afterward, I looked into Google Tour Operator’s recommendations for 360° images and this is what I found:
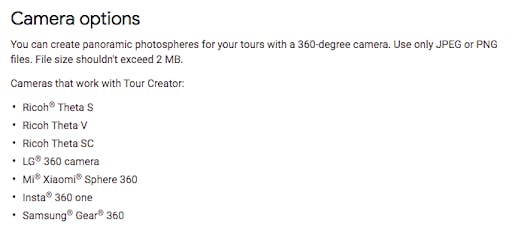
Conclusions on uploading? This definitely seems like the way to go if your goal is to create a unique experience that only you can provide. Although there is more work upfront to produce some images yourself, the end result will be 100% you and more likely to attract viewers.
On both the street view and upload options, there were a few more choices to provide a more immersive experience, the first of which was to add sound. The option to add “ambient audio,” A.K.A. sounds from the environment you are showcasing to help viewers feel like they are really there. Think, hearing rushing water while viewing a majestic waterfall or the murmur of lively chatter while viewing a crowded restaurant. Capturing ambient sound on your own can prove difficult unless you have access to more advanced sound recording equipment, but purchasing royalty-free stock audio clips may be a worthwhile and cost-effective addition to bring your imagery to life. For my own experimental purposes, it didn’t seem worth it, but I can imagine how that additional layer of sound could really take things to the next level.
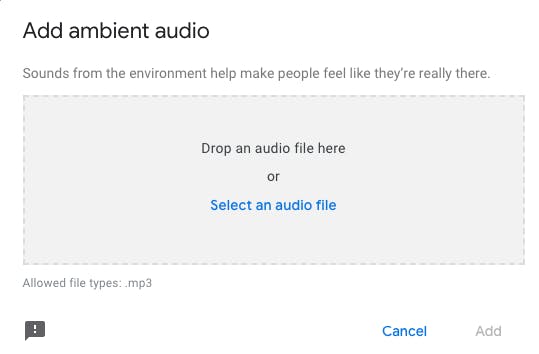
The second sound option was to add narration. Personally, hearing the sound of my own voice is something that haunts my dreams, but for seasoned tour professionals out there, I think this would really enhance the overall tour experience. Not only would it be more informative to viewers, I believe that hearing a knowledgeable guide speak to the visuals I was seeing would make me feel like I was actually taking a tour rather than flipping through Google images of a particular location or topic.
Although I did not pursue the audio add-ons for my makeshift food tour, I did experiment with the option of adding points of interest to my scenes. By selecting “add point of interest” you can pinpoint any specific area within the displayed image to highlight with an additional title and description. You can even add either of the audio options (or both!) per point of interest to add multiple layers of discovery to your scenes.
To me, adding points of interest felt like creating a game of “I Spy” to encourage viewers to spend time in each scene, uncovering the tidbits of information included in each frame. Again, this would only be as successful as the time you spent adding these interest points into your imagery, but definitely an overall easy way to transform a still picture into an engaging, interactive experience.
Once you are satisfied with the scenes of your tour, it’s time to share it with the world! Just as the rest of the Google Tour Creator user experience had been, I found this part to be simple and straightforward. By simply hitting the blue “publish” button, I was prompted to select a visibility choice (unlisted or public), and voila! A shareable Google Poly link and the option to view my published tour appeared!
This link can be used to share with others via social media channels, be included in an email or blog post, or used anywhere you can share a link. Looking to integrate this experience directly into your website or the body of an email? Clicking the “share” option and selecting “embed” generated an embed code quickly and easily.
In the published view, the panoramic images came to life by instantly rotating through the view. The points of interest I had added appeared as little “information” icons, which displayed as nice sidebar pop-ups when clicked. For viewers, the published view gave the opportunity to “like” or share through Facebook, Twitter, or Google Expeditions.
Need to make more changes? It was easy to toggle back and forth between my published tour and the editing interface to continue to fine-tune my existing scenes or add additional scenes. How convenient!
Overall, Google Tour Creator is intuitive and easy for anyone to use. It’s free and there is a lot you can do with it without incurring additional expenses. If you are already using other Google VR and AR tools, or plan to do so in the future, adding Tour Creator to your lineup seems like a no-brainer.
That said, my experiment showed me that the end experience created through Tour Creator is only as good as the time you put into it. If you are willing and able to spend time taking your own images from unique perspectives, adding fun or intriguing points of interest, and possibly taking things to the next level with ambient noise or narration, you have the ability to create impactful, ownable virtual experiences that showcase your one-of-a-kind knowledge.
CHECK IT OUT FOR YOURSELF: https://arvr.google.com/tourcreator/