Hopefully, by now you’ve read our guide on the first steps to creating a virtual tour and have come up with a few ideas on how you can make it work for you. Virtual experiences like online classes and narrated sightseeing tours offer a great alternative when social gatherings aren’t an option. And during the current situation, this virtual contact is a welcome form of entertainment for viewers at home. Plus, virtual experiences bring you closer to your audience and foster relationships that will continue in person when we’re allowed to travel again.
There are a lot of different options out there when it comes to running a virtual tour. You’ve likely seen the various video conferencing apps in the news and on social media as people around the world use them during the pandemic, and there are a couple more options available depending on the style of experience you’ve created. We’ve rounded up a few of the most common and easiest-to-use platforms to help get you on your way! This guide walks you through the pros and cons of each platform and helps you find the one that’s best for your unique virtual experience.
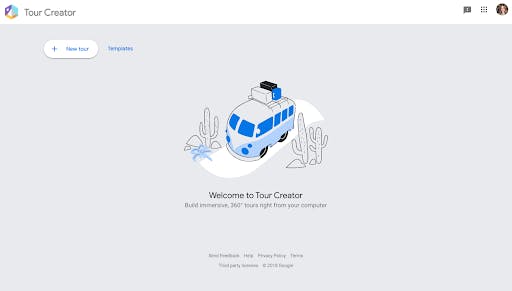
Google Tour Creator
Originally created in 2018 as a tool to help students make their own VR tour, Google Tour Creator is a free tool powered by Google that makes it easy to create shareable, 360-degree virtual tours right from your computer – either by using your own images or those available on Google Street View. It is compatible with Google Cardboard and Google Expeditions, an app that creates VR (virtual reality) and AR (augmented reality) experiences for teaching and learning.
We take a deeper dive into Google Tour Creator in another Compass guide (check it out, it’s pretty fun to play around with!), but have outlined some of the major highlights and drawbacks below.
-
Pros:
- Free, online, do not have to download additional apps.
- Ability to share published tours via your blog or social media accounts or embed within websites and emails.
- Seamless experience across device types.
- Compatible with Google Cardboard and Google Expeditions.
- Can add narration and ambient audio to enhance the immersive experience.
-
Cons:
- Limited to pre-existing Google images if you do not have your own images.
- Full 360° images provide the best experience, so it may not provide a seamless experience if you don’t have those types of images.
- Providing a unique, immersive tour requires time by creator adding points of interest, sound, and impactful imagery.
-
Recommended for:
- Walking tour
- Local ghost tour
- Graffiti/public art tour
- Local monuments/historical landmarks tour
Zoom
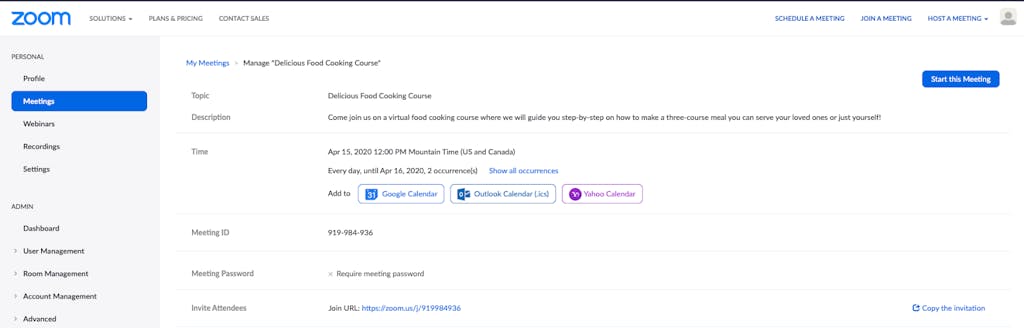
By now most of you have probably heard of Zoom, even if you haven’t used it yet yourself. Zoom has emerged as one of the most used virtual meeting platforms out there within the midst of the Coronavirus pandemic.
With Zoom you have the ability to host online meetings or interactive webinars based on the subscription you choose. You can create specific registration links for your meetings or webinars to include in follow up emails for your event. Make sure to test this out depending on how you will be using the software to schedule your events to find what works best for you. They offer tiered pricing that is outlined in detail on their website.
Pros:
- Free option for up to 100 attendees, with a 40-minute meeting limit. Unlimited 1 to 1 meetings.
- Interactive – attendees can “raise their hand” and ask a question of the presenter.
- Ability to add a virtual background options if you want to make the experience feel more real!
- Gallery view option with up to 25 video feeds per screen.
- If you purchase the webinar option you can pre-record “on-demand” webinars and let your customers participate whenever they want.
- Can be used on desktop or mobile app.
- Zoom hosts daily training webinars to help get you started using Zoom Meetings as well as weekly deep-dive sessions.
Cons:
- Free option has time and attendance limitations.
- Not a con per se, but attendees do have to download the Zoom app prior to attending the tour. Make sure to provide clear instructions on how to do so ahead of time!
- If you have a longer event, you will most likely need to purchase the Pro package
- Depending on your package you can only create a single link for a time slot (cannot have multiple virtual tours with different links running simultaneously).
- Their support is overloaded right now and it could be hard to get assistance.
Recommended for:
- Painting and crafting classes.
- Instructional or teaching classes.
- Food and drink tastings.
Because Zoom is ideal for use with smaller groups and in instructional type settings, it will not work for all tour types. One of the best things Zoom has going for it is that it is really user-friendly and many people are already familiar with the software, or the format of the software. Plan support and meeting capabilities only grow with higher-tiered plans, with even the Enterprise plan capping out at a very reasonable $20/month.
Social Media Live
Live streaming on social media isn’t just for influencers anymore! With over 1.62 billion people active on Facebook daily (Hootsuite) and over 500 million daily users on Instagram (Hootsuite) there’s no debating the sheer reach of these platforms. Most businesses already have a presence on Facebook and Instagram, and now could be the time to try something new to connect and grow your reach.
Facebook Live
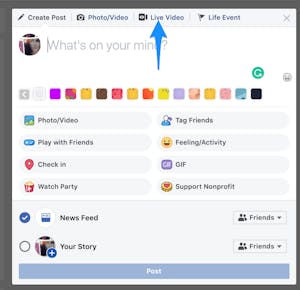 It is really easy to get started with live-streaming on Facebook — just log in to your Facebook account and select “Live Video” as your post type — and it takes you straight to the “Live Producer.” From there you can share to your timeline, a page you manage, or to a group. Give your live video a quick title and description and you are good to go!
Pros:
- Free!
- Easy to use and most people already have a Facebook account set up and can get started right away.
- You can see how your video is performing in real time and you have the ability to moderate comments and choose the kind of engagement that fits your video.
- Choose between going live now, or scheduling a live event.
- Live clipping – create highlights of the best parts of your live video.
- Your FB live event sticks around – it can stay on your page permanently for viewers to watch later even if they’ve missed the live stream.
Cons:
- FB will notify only some of your followers when you go live, and the notification may or may not show up in the timeline of your followers’ feed.
- You cannot see exactly who’s watching your stream but rather are provided with a total number of attendees.
- You cannot have two accounts on one stream.
- You cannot present saved pictures and videos.
Recommended for:
- Group classes where real-time interaction is key to success
- Cooking classes, painting classes, food & wine tastings
- Escape rooms and other team building activities
- Giving people a “behind the scenes” look at your operations
- Ex. Give them a tour of your studio
Instagram Live
 Given that Instagram and Facebook are owned by the same parent company, it comes as no surprise that Instagram Live shares many of the same core benefits with Facebook Live such as being free and very user-friendly, with some notable differences between the two.
To get started, simply open your Instagram app, click on the camera icon in the top left-hand corner, find the “Live” option at the bottom of the feed, and then hit the record button — voila, you’re live!
Pros:
- Free and easy to get started.
- You can save your video to your camera roll (note: it will not save comments, likes, and viewers).
- Ability to add a comment, pin a comment, or turn off comments altogether.
- Notifies all your followers who are currently using the app the second you go live, and your livestream will be clickable at the top of the app (in stories) for anyone who follows you that logs on while you are live.
- You can see exactly who joins your stream right when they click “watch” (rather than just seeing total numbers of viewers as on FB live).
- Allows for a higher degree of viewer interaction – anyone who is watching can request to join, and with your approval, the stream will dissect for viewers – half showing your screen and half showing the second screen.
Cons:
- This could be a pro or a con depending on how you prefer to share your experience – Instagram lives go away as soon as streaming stops (unless you share to your story), so people cannot come back and access the content if they miss the live version.
- You cannot schedule a live stream on IG.
Recommended for:
- Tastings – wine/cheese/chocolate/beer/liquor
- Art classes – paint & sip
- Cooking classes
- Cocktail & bartending classes
- Trivia night
- Virtual events – Easter egg hunt/birthday party
- Team building activities
- Live comedy shows or music performances
As with any live-streaming platforms, the #1 piece of advice is to be prepared! Get your thoughts together in the same way as if you were hosting an in-person tour or class, and make sure to practice in advance. Keep in mind that it will probably take a few minutes for everyone to join the live stream so come prepared with a story or two to warm up the group and create connections during that time. And check in with attendees as you go, people will join and exit along the way so make sure to ask questions and encourage audience participation.
Make sure to consider:
- Live means live, which means anything can happen, from technical difficulties to issues with censoring, to lulls in audience participation.
- Timing creates some issues around accessibility and attendance, especially if you are looking to reach across time zones, so you might have to consider hosting multiple live events on the same topic.
- By nature, social live streaming provides a more casual and reactive setting and so could pose issues for activities or experiences that require more structure and advanced planning.
Regardless of the platform you choose, you should “go live” on the app where you have the larger following, and build up the hype ahead of time with a few posts (on every platform) explaining why, when, and where you will be going live.
Google Hangouts Meet
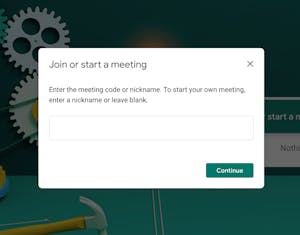 Google Hangouts Meet is another communication platform that many people are already familiar with, and operates as part of Google’s G-suite subscription service. At its core Google Hangouts is a video conferencing platform that can be used through a variety of apps and devices and also offers call and messaging services.
Pros:
- Seamless integration with other Google applications, including Google calendar.
- Ability to schedule a Hangout and send a link to participants.
- Built-in screen-sharing and file sharing.
- Compatible with many different device types.
Cons:
- No free option, as it is a part of Google’s G-suite subscription (but the basic version starts at $6.00 per month).
- April 2020: In response to the current health crisis Google is now offering all G Suite subscribers access to the Enterprise edition of Hangouts Meet at no extra cost. The additional features will be available until July 1, 2020 – with a base subscription fee.
- Does not offer as many bells and whistles as other platforms dedicated solely to video conferencing (such as Zoom).
Recommended for:
- Educational classes
- Instructional workshops
- Virtual happy hour and other team building activities
Getting set up in your FareHarbor Dashboard
Create a new item OR update item/activity titles
- Update item/activity descriptions to include virtual elements – add a clear description, pictures, custom fields, and availabilities so that your customers can book online.
- If you choose to charge for your tour or experience customers will pay as normal directly through your FareHarbor dashboard
Update your website
- Create an activity page if possible or add the item to your booking flow along with a call out on your website.
Optimize your confirmation email
- Be very clear with your confirmation and reminder emails as they will contain the link needed to access your virtual experiences.
- Add the virtual access details to your confirmation information under item “Info & Policies”
- Update “Automatic emails & texts” for the virtual item to send an email reminder 1 hour before the event (or however long in advance you prefer)
- Change the “Don’t send a reminder if the booking was made within” box to 1 as well (or 3-5 hours, use your judgment).Example: Customers will receive a full refund or credit with 24 hours notice of cancellation. Customers will receive a full refund or credit in case of operator cancellation due to unforeseen circumstances. Contact us by phone to cancel or inquire about a cancellation. No-shows and late arrivals will be charged the full price. Customers should test their internet and device access at least one hour in advance to avoid technical issues so they are not counted as a no-show.
Review or modify your cancellation policy
- If your cancellation policy for your virtual experience needs to be different than your usual policy – Create a new “Virtual Event” cancellation policy on dashboard level that could be applied to each virtual event item.
- For example: “Customers will receive a full refund or credit with 24 hours notice of cancellation. Customers will receive a full refund or credit in case of operator cancellation due to unforeseen circumstances. Contact us by phone to cancel or inquire about a cancellation. No-shows and late arrivals will be charged the full price. Customers should test their internet and device access at least one hour in advance to avoid technical issues so they are not counted as a no-show.”
Using 3rd Party Tools
Once you have set up your event in your desired platform registration links can be included in your confirmation and follow-up emails.
Conclusion
Now that you have a better idea of which tools might work best for your virtual offerings, give them a try! As you’re brainstorming what type of experience you’d like to offer, consider what capabilities you’ll need to share that event with viewers at home. Remember, there’s plenty of time to play around with the different options and you can even try the same event across platforms to see what offers the best viewing experience. We’d love to hear of any creative virtual tours you’ve come up with, so let us know how your experience has been by leaving feedback below (bottom of the page).