- 6 minute read
- Digital Marketing
- Social Media
Want to add a clickable link in Instagram? Use a Link in Bio Tool
Intermediate
Spark is headed to the Big Easy! Join us in New Orleans October 13-15. Registration opens soon!


Facebook and Instagram have a whopping 3 billion active users combined, making them the most important platforms for business owners looking to reach a wide audience. Building a dedicated following organically can take a lot of time and work, but paid advertisements on these social media platforms make it easier to reach new and existing customers who are interested in what you have to offer.
This guide will cover how to set up ads for Facebook and Instagram, which is done through Facebook Ads Manager for both platforms.
Before you even open Facebook Ads Manager, it’s important to have a goal in mind for your advertising campaign. If this is your first time creating an ad, it might be difficult to set a specific goal, such as increasing bookings by a certain percentage, but you should still set a goal you can measure against. You can always revise your goal(s) after your ads have run for some time and you have data to work from, but it is critical to have a purpose in mind before engaging in a paid ad campaign.
Decide whether you’d like to increase engagement on Facebook, create awareness about your brand, increase traffic to your website, or boost your conversions. You’ll be asked to select an objective when you begin creating your ad campaign, and setting a goal in advance will help make this step a breeze. For more on setting marketing goals, check out our digital marketing strategy guide.
Now that you have your goal in mind, make sure you’re logged into your business’ Facebook page, and head to https://www.facebook.com/adsmanager. (You can also go to Ad Center right from your Facebook profile, but this pared-down dashboard is not as robust as Ads Manager.)
The first step in making a new ad is to create a Campaign. Consider this the highest level of your campaign, where you set your overall objectives. Your Ad Sets (different groups of people who will see your ad based on a variety of factors) and the unique Ads you create for each Set are all nested under the Campaign, but more on those later.
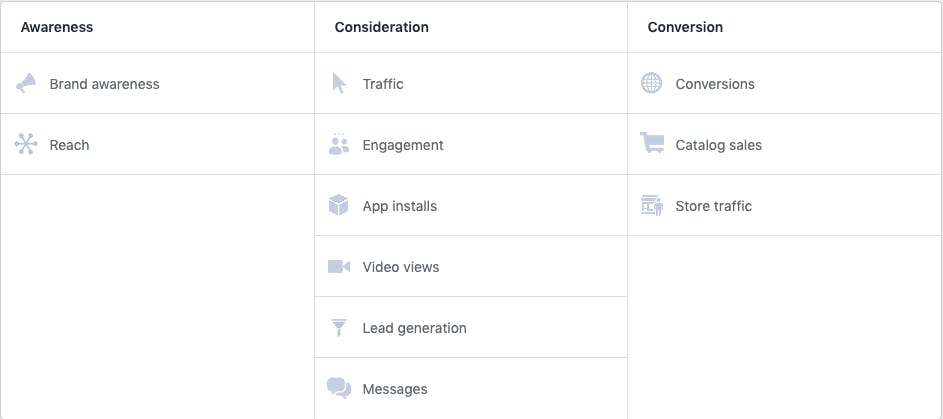
For now, you need to select your objective. Facebook gives you three main categories to choose from — Awareness, Consideration, and Conversion — with more specific objectives under each one.
Once you select your objective, make sure you rename your campaign (the default name is the type of objective you’ve chosen) to something that makes sense to you. Facebook gives you a couple of additional options on this page, such as Create a Split Test and Campaign Budget Optimization, which can be helpful if you’re trying out ads for the first time.
You’ve set your goal and chosen the objective that best aligns with that goal so now you can get started on defining your audience. This step is where you create your Ad Sets, groups defined by factors such as location, age, gender, and more detailed factors like behaviors and interests. Facebook knows quite a bit about its users, which means you can get as specific as you want with your audience. For example, you can choose to target frequent travelers between ages 18 – 35 who are single and are college graduates.
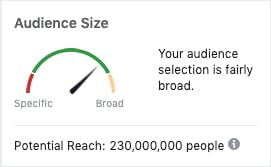
As you refine your audience, you’ll notice Facebook gives you an estimated audience size. The more specific you are with your audience perimeters, the narrower your reach will be; strive for a balance between a broad enough audience to reach a lot of people and a specific enough audience so that you know your ad is being seen by people who are interested in what you have to offer.
Depending on your objective and your target audience, you might create one Ad Set that works for all your potential customers, or you might create a few different Ad Sets. Specific ads are nested under Ad Sets, so think about what those will look like and how they will work together. For example, if you offer a singles booze cruise and a romantic sunset cruise, you would want to create two different Ad Sets so you can target different audiences for each cruise. For example, your campaign might look like this:
If you have a contact database for your business, you can also choose to upload it to create a Custom Audience. This is especially helpful if you’re looking to target existing and return customers.
The next step in creating your ad set is to select placements for your ads. The first option is Automatic Placements, which allows Facebook to decide where to place your ads based on where they think they’ll perform best. Facebook recommends this option, and they allocate your budget for different placements across Facebook, Instagram, Messenger, Stories, and more. If you have a specific idea of where you want your ads to show up, you can choose Edit Placements. This option allows you to select the platforms, devices, feeds, and sites where you want your ads to appear.
 Pro-tip: If you are uncertain about your ad placement selecting Automatic Placement is generally a safe choice because it uses the platform’s knowledge of user behaviors to optimize your placements.
Now it’s time to set the budget and schedule for your ad. First, you’ll be asked what you want to optimize your ads for, whether that’s landing page views, link clicks, reach, or impressions. This helps Facebook determine how to spend your budget.
You can select a lifetime budget — for example, if you want to run an ad for the week leading up to Thanksgiving — and allow Facebook to choose how to allocate your budget each day. If you select a lifetime budget, you’ll be asked to select a start and end date for your ads.
If you want your ads to run continuously each day, you can set a daily budget, and Facebook will allocate it as needed to get you the best daily results. You can still select a start and end date for your campaign, or you can set your ads to run continuously until you decide to stop them.
Facebook ads, like all PPC ads, work on a bid strategy. If you want to control how much you spend on a result (like link click), you can set an optional Cost Control. If this is your first time running an ad, allow Facebook to use your budget in the best way possible to achieve your objectives. If you have a really specific idea of what you want your bid strategy to be, however, you have the option to set more advanced options.
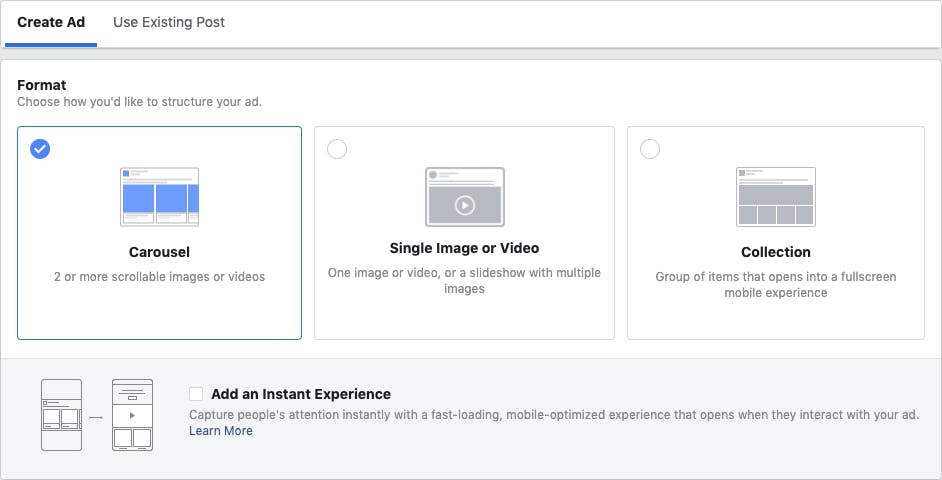
Now that you have the nitty-gritty details out of the way, you can get started on the fun part, creating your ads! There are three main options for your ads: Carousel, Single Image or Video, or Collection. Which one you choose will depend on what kind of marketing assets you have to work with.
If you’d prefer to use an existing post that reflects your business really well, you can select it under the Use Existing Post tab.
When choosing what type of media to use for your ad, keep in mind that you want it to be eye-catching, represent your business well, and follow Facebook’s specifications. Specifications often change, but they’re conveniently displayed right on the screen when you’re uploading your media. Generally, you want to keep the aspect ratio at 1:1 (square) so the images or video will work equally well on Facebook and Instagram. The current recommended image size is 1080 x 1080 pixels.
Pro-tip: One important rule to remember is that Facebook will not allow you to use images with a lot of overlaid text, so something like an event flyer won’t work. Keep your images clean and simple, and only use text when needed. If Facebook determines that your image has more than 20% text, they will not permit you to use it in your ad.
In addition to your ad’s media, you also need to create a Headline, Description, and URL where you want users to go when they click on your ad, and body text. Make sure to keep these concise and descriptive. To avoid having your text cut off, stick to these character limits:
As you create your ads, you can preview how they will look on different platforms, feeds, and devices. Make sure to check these to make sure your text is displayed correctly.
Finally, you can select your call to action button depending on what action you want audiences to take. If your objective is to increase conversions, Book Now would work best. If you want users to subscribe to your newsletter, you can select Subscribe.
Once you’re happy with your ad, click on Confirm! Facebook will review your ads to ensure they don’t violate any of their guidelines, and you will be notified once they’re approved.
Don’t skip this step! After the work of getting your ads up and running is done you might be tempted to set-it and forget-it, but it is critical to monitor your ad performance. After your ad has been running for a day or two, you can track your performance within the Facebook Ads Manager. This will allow you to access insights on your results (such as impressions and clicks) as well as an estimate of how much you’re spending each day and how much each result is costing you on average. Like every aspect of marketing, analyzing your performance is what will allow you to make any adjustments needed to perform better. For example, if one of your ads is doing much better than the rest, you can reallocate your budget to spend more on the best-performing ad.
If this is your first time working with Facebook ads, it’s a good idea to start small and gather insights to help you understand what works best for your business and what metrics matter most to you. Once you have an idea of what performs best, you can increase your budget or create new ads.
Social media ads are an important tactic that can help you reach a wide audience. Facebook Ads Manager is a robust tool that gives you a lot of flexibility and insight to help you create successful ads. Start exploring Ads Manager and experiment with your first ad today! Ready for more results? Head over to our PPC guides to learn more tactics!